A pressotherapy machine is one of the few pieces of clinic equipment that is bought almost entirely on its mechanics. The pump itself does a single job — it pushes air into sealed chambers inside a garment and lets it out again in a set order — and almost every difference between two quotations lives in four places: how many chambers the garment is divided into, how much pressure the pump can hold in each of them, how the cycle is timed, and how well the garment fits the person lying on the couch. None of those four is visible in a showroom photograph, and none of them usually appears on the quotation, which is why two units that look the same on a stand can behave very differently once they are in a treatment room.
This guide is written for the people who buy and run these rooms — clinic owners, rehabilitation centre managers, sports recovery studios and the distributors who supply them. It works through the mechanism first, because the mechanism explains every later decision: the chamber count, the pressure range, the length of a cycle, the garment sizes, the hygiene routine between clients, and the way a single unit fits into a booking sheet. It stays on what the machine does and how it feels to use. Which client is suitable for a compression session is a professional judgement for the trained operator and the referring clinician, not something a supplier's page should be deciding, and nothing here is written as a treatment protocol.
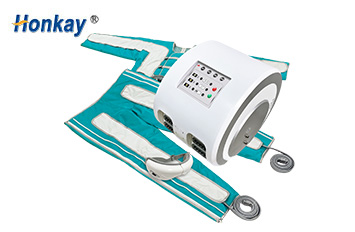
Physically, the machine is a small air compressor, a valve block and a controller, connected by a bundle of hoses to a garment made of overlapping air bladders. Each bladder, usually called a chamber or a cell, is a separate sealed pocket with its own hose. The controller opens and closes the valves in sequence, so the chambers inflate one after another instead of all at once, and the direction of that sequence is what gives the treatment its character: the wave starts at the part of the limb furthest from the trunk and moves towards the trunk.
That single design decision is the whole mechanism. Because the chambers fill in order rather than together, the pressure never closes off a segment completely; each chamber pushes what is in front of it towards the next one, which is still open at that moment. The visible result, and the reason the format is popular in clinics, is a slow rolling squeeze that travels up the leg or the arm, holds for a moment, and then releases from the top downwards before the next pass begins. Nothing is punctured, nothing is injected, and the client is awake and talking throughout — the sensation is closer to a blood-pressure cuff that moves than to anything else in the room.
| Stage of the cycle | What the pump and valves are doing | What the client feels |
|---|---|---|
| Fill | One chamber is opened to the pump until it reaches the pressure set for the programme; the chambers ahead of it stay closed | A band of pressure appears at one point and firms up over a second or two |
| Hold | The valve closes and the chamber is left pressurised while the next one behind it fills | The first band stays and a second joins it, so the squeeze appears to travel |
| Vent | Chambers are released in the reverse order, from the top of the limb downwards | The pressure lifts away from the top first, which is the part most people notice |
| Rest | All chambers sit open for the pause set in the programme, then the pass repeats | A short gap with no pressure at all, long enough for the client to settle |
| One full pass | A complete sequence from the furthest chamber to the nearest, repeated by the controller until the session timer runs out | A rhythm the client can predict after the second pass, which is what makes the session restful |

The diagram above is the mechanism in its simplest form: four chambers on one leg, each one filling after the one below it, with the arrows showing the direction the pressure travels. Every larger garment in a clinic does the same thing with more chambers and more hoses, and the principle does not change when the garment moves from the leg to the arm or the torso — only the number of chambers, their layout and the pressure they are asked to hold.
Pressure range is the number buyers skim past, and it is worth pausing on. On this class of machine the pressure is set either as a numbered level on the panel or as a value in millimetres of mercury, depending on how the controller is built, and the figure that matters is not the top of the range but the two ends of it. The bottom end decides whether a nervous first-time client can be started comfortably, and the top end decides what the pump can actually hold once a garment is wrapped tightly around a large thigh. Ask for both, and ask how many usable steps sit between them, because a range quoted as a single maximum tells you nothing about the first session a new client will have.
The cycle is the other half of the mechanism. A cycle is one complete pass of all the chambers in the garment, and its length is set partly by the design of the garment and partly by the programme: a garment with many small chambers needs longer to complete a pass than a garment with four large ones, and a programme that holds each chamber longer stretches the pass further. Ask for the cycle length of the garment you are buying, not of the pump alone, because the two are only meaningful together. A cycle that is too fast feels like a flutter rather than a squeeze, and one that is too slow leaves the client waiting between waves.
Chamber count is the specification that decides how the treatment feels and how much of the body one session can reach, and it is the number most often reduced to a single figure on a brochure. That figure is misleading on its own, because chambers are spread across garments rather than shared: a jacket, a pair of pants, a pair of arm sleeves and a pair of leg cuffs each carry their own chambers, and the total depends on which of those you are using at the same time. A unit quoted with a large chamber total may be counting every garment in the box, only one of which the client wears at once.
What more chambers buy you is resolution. With four large chambers on a leg, the squeeze moves in four broad steps; with ten or twelve smaller ones, it moves in finer steps and reads as a continuous wave travelling up the limb rather than as a series of separate squeezes. That difference is a comfort question as much as a technical one, and it is the thing clients notice first when they use two machines on consecutive visits. The trade-off is time and maintenance: more chambers mean more hoses to connect, more seams to fail, and a longer pass to complete.
| Body area | Which garment covers it | What a higher chamber count changes | What the client notices | What to confirm in writing |
|---|---|---|---|---|
| Foot and ankle | The foot section of the leg cuff, or the trouser leg if the garment continues to the toe | Adds the first step of the wave, so the squeeze starts lower and the pass feels longer | A firm, even pressure around the foot rather than a single band | Whether the foot section is a separate chamber or part of the calf chamber |
| Calf | The lower section of the leg cuff | Splits the calf into several steps instead of one, which is where most of the wave sensation comes from | The clearest travelling sensation in the whole garment | The number of chambers in the cuff and the length of leg it is designed to cover |
| Thigh | The upper section of the leg cuff, or the leg of a full trouser garment | Keeps the wave moving above the knee instead of stopping at it | Pressure that reaches the top of the leg without pinching behind the knee | How the garment is cut around the knee, and whether it can be adjusted for a shorter leg |
| Hip and waist | The seat of a trouser garment, or the lower hem of a jacket | Adds a chamber above the hip so the sequence finishes at the waist rather than at the top of the thigh | Firmness across the seat, which some clients find the least comfortable part of the session | Whether the waist chambers can be switched off for clients who do not want pressure there |
| Abdomen and lower back | The body of a jacket or vest garment | Spreads the squeeze across the waist in several horizontal bands rather than one | A corset-like pressure that many clients describe as the most restful part of a full-body session | Chest and shoulder coverage, and whether the client can sit up wearing it |
| Arm | Arm sleeves, or the sleeves of a jacket | Allows a separate pass on the arm while the legs are resting, or one combined pass | A shorter wave that some clients find surprisingly strong at the wrist | Whether arm sleeves are included, optional, and how they connect to the same hose ports |
| Whole body in one session | Jacket plus trousers plus, in some configurations, the arm sleeves | Raises the hose count and the pump's workload, and lengthens the pass considerably | Coverage everywhere at once, at the cost of a longer set-up and a warmer session | The maximum number of garments the controller can drive at once, and whether the pump slows when all are connected |

The sheet above is the most useful document a supplier can send you before you order, because it does what a brochure photograph cannot: it maps the chambers to the garment and puts a dimension on the cut. Ask for exactly this for every garment in the configuration you are considering — a drawing with the chamber rows numbered and the key dimensions marked — and keep it. When a client asks why the squeeze on the thigh feels different between two of your rooms, that drawing is the answer.
One practical rule follows from all of this. Decide the body areas first, then the garments, then the chamber count. A room serving mostly lower-limb recovery work needs a good leg garment with a fine chamber split far more than it needs a jacket with a large total. A studio selling full-body sessions needs the jacket and trousers to work together on one pump, which is a limit on hose ports rather than on chambers, and it is worth checking that limit before the order rather than after.
A compression garment only works where it touches. If it is loose around the thigh, the chamber inflates into the gap instead of against the leg, and the client feels a soft balloon rather than a squeeze; if it is too tight across the shoulder, the client will shift and complain within minutes. That is why garment sizing deserves more attention at the buying stage than the pump, and why a supplier who offers one size and tells you it fits everyone is telling you that your clients will be fitted by luck.
What a well-made garment offers instead is adjustment in two directions. Length is handled by overlapping sections, a multi-segment cut or a zip that runs the full length of the limb; girth is handled by elastic straps or a second row of fastenings. Between them, one garment can be fitted to a wide range of bodies without being either loose on a small client or short on a tall one. Check both adjustments on a person of roughly average size before you commit, and then check them again on the smallest and largest client you expect to treat.
| Fit problem | How it shows up in the room | Adjustment built into the garment | What to ask the supplier |
|---|---|---|---|
| Loose around the thigh | The chamber billows instead of pressing, and the client reports a weak session | Elastic straps across the leg, or a second fastening row | The thigh circumference the cuff is designed for at its smallest and largest setting |
| Too short in the leg | The cuff rides above the ankle and the foot is left out of the sequence | Overlapping sections, or a full-length trouser leg instead of a cuff | The total length of the cuff and whether a longer version is stocked |
| Too tight across the chest | The client breathes shallowly and asks for the session to be stopped | A chest section that can be left unzipped or switched off | Whether individual chambers or zones can be disabled on the controller |
| Torso too short for a tall client | The waist chambers sit on the ribs, and the sequence ends in the wrong place | A multi-segment body with an adjustable hem or strap | The torso length and whether a larger jacket is available as a separate item |
| Hoses pulling on the garment | The client feels a tug at the connector, and the seam at that point fails first | A hose bundle long enough to reach the pump from the couch without tension | The hose length supplied, and whether longer hoses can be ordered |
Hygiene is the second half of the garment decision, and it is the part most often left until the machine is already in the room. A compression garment sits against bare or lightly clothed skin for half an hour, over the legs, the seat and the abdomen, and then the next client gets into it. It cannot be treated like a towel, because the air cells inside it will not survive a hot wash and the hoses cannot go near water. The routine has to be designed around that constraint rather than improvised after the first complaint.
The workable pattern used by clinics that run several compression sessions a day is a barrier layer plus a wipe-down. A thin single-use liner — a sheet or a purpose-made disposable garment worn under the compression suit — takes the skin contact, and it is changed between every client. The inner surface of the garment is then wiped with a suitable surface wipe and left open to air between sessions rather than folded away damp. Where the same client returns regularly, many rooms keep a named garment for that client for the course of their programme, which removes the shared-contact question entirely and is easy to explain at the desk.
| Control point | Why it matters | What to do between clients | What to keep in stock |
|---|---|---|---|
| Skin-contact surface | It is the only part that touches every client, and it cannot be laundered | Remove the liner, wipe the inner surface, hang the garment open | Single-use liners sized to the garment, in a dispenser at the couch |
| Inner bladder and seams | Moisture trapped in a seam is where odour and staining start | Wipe, then let the garment hang fully open until the next client is due | A second garment set, so one can dry while the other is in use |
| Zips and straps | Handled by every operator, every session, and rarely cleaned | Wipe the touch points along with the inner surface | Nothing extra — but add it to the end-of-day routine |
| Hose connectors and ports | They are handled with the same hands that have just been on a client | Wipe the connector bodies, and keep the ports capped when unused | Spare connector caps and one spare hose |
| Storage between sessions | A garment folded while damp keeps the moisture in and creases the bladders | Hang it, don't fold it; keep it off the floor and away from the pump's exhaust | A hook or a rail beside the couch, one per garment in use |

The four details above are the ones that decide how long a garment survives in a working room: a zip with enough layers to close over different body sizes, a connector that seats tightly enough not to leak, an inner bladder that holds its shape, and a strap that can be tightened with one hand while the client is lying down. Ask to see all four on a garment that has been used rather than one straight out of the box, and ask which of them is repairable and which means replacing the whole garment.
Session length is set on the controller, but room time is set by everything around it, and the two are rarely the same. A compression session in most clinics runs somewhere between twenty minutes and forty, depending on the garments in use and how long the operator wants the client resting; add the time to fit the garment, connect the hoses, run the programme and get the client up again, and a single booking occupies the couch for considerably longer than the timer shows. Plan the room on total occupied time, not on session time, or the first busy Saturday will teach you the difference.
The scheduling advantage of this equipment is that the operator is not needed for most of the session. Once the programme is running, the machine holds the pressure and steps the chambers by itself, and the operator can be with another client. That is what makes compression attractive in a small room: it converts an empty couch into a service without converting it into an extra member of staff. What it does not do is supervise the client, so the room layout has to keep every couch in sight of the person who is responsible, and the timer has to be audible or visible from where that person is standing.
| Session format | What it occupies on the booking sheet | Operator attention during the session | Which room it suits |
|---|---|---|---|
| Single area, lower limb only | Shortest fit-up and shortest pass; the easiest slot to insert between other bookings | Fit-up at the start, then nothing until the timer ends | A clinic adding compression to an existing treatment menu |
| Full lower body | Longer fit-up because the trouser garment has more fastenings, and a longer pass | Fit-up, one check after the first minute, then nothing | A sports recovery studio running back-to-back sessions |
| Full body, jacket and trousers | The longest slot in the day, and the one that ties up a couch and a garment set | Fit-up plus a comfort check once the jacket is pressurized | A wellness centre selling longer, restful appointments |
| Back-to-back block | Three or four sessions per couch per half-day, with a changeover between each | Continuous light supervision; the operator never leaves the floor | A room with a second garment set and a dedicated couch |

The panel above is where the session is actually defined: a programme button, a timer, a temperature setting for the warming function if the model has one, and a pressure level. Note that the timer is not a treatment length you have to accept — it is a limit you set. If the client's programme calls for a shorter session, the timer is turned down, and the cycle simply stops when it runs out. That is worth demonstrating to every operator before the first client, because a machine left on its longest setting by default is a machine that eats a room's schedule.
The set-up routine is the other half of the scheduling question, and it is worth timing rather than guessing. Fitting a jacket and a trouser garment, connecting eight or more hoses to the right ports, seating the client and starting the programme takes a trained operator a few minutes and an untrained one considerably longer. The photographs below show the order that works: garment laid out on the couch first, client dressed into it, fastenings adjusted, hoses connected as a bundle, then the programme started.

Two operational notes come out of that sequence. The first is that the hose bundle is connected before the client lies back, not after, because reaching behind a reclining client to find a port is how connectors get bent. The second is that the garment is laid out before the client arrives rather than pulled out of a cupboard in front of them; a room that does this looks prepared, and the set-up time drops by a couple of minutes per session, which across a week is most of an extra appointment.
Once you know the garments you need, the machines themselves sort into a smaller number of real differences than the brochures suggest. Four of them decide the choice: how many hose ports the controller can drive, how finely the pressure can be set, how many programmes are stored and how usable they are, and whether the unit is a piece of furniture in the room or something that lives on a shelf. A fifth — the add-on functions such as a warming setting or an eye piece — is a commercial question rather than a mechanical one, and should be judged on whether your clients will pay for it rather than on whether it is included.
The configuration chart below is useful because it shows the same housing paired with different garment sets, which is exactly how these units are sold: the pump is common, the garments are the variable. Two buyers with identical pumps can end up with very different services depending on which lines they chose. When you compare quotes, compare the lines, not the machine.

| What varies between units | Why it matters in a working room | A smaller configuration | A larger configuration | The question to put in writing |
|---|---|---|---|---|
| Hose ports and chamber capacity | It caps how many garments can run at once, which caps the service you can sell | Enough ports for one leg cuff set, or one trouser garment | Enough for jacket, trousers and arm sleeves together | The maximum number of garments and chambers the controller drives simultaneously |
| Pressure steps | Decides whether a first session can be gentle and a later one firm | A short ladder of levels, so the jump between settings is noticeable | A finer ladder, so comfort can be tuned client by client | The full range and the number of usable steps between the lowest and highest setting |
| Programme count | Only the programmes your operators understand get used, however many are stored | A few fixed sequences, each covering one garment combination | Several sequences plus adjustable timing for each | A list of the programmes, which garment each is designed for, and whether timing can be edited |
| Housing form | Determines the floor space, the socket position and how the room is laid out | A smaller housing that sits on a trolley or a low table beside the couch | A larger housing carrying its own hoses and garment storage | The footprint in use, the footprint for storage, the weight and the supply it expects |
| Add-on functions | They add perceived value, but only if the client is told about them and likes them | Compression only, with no warming and no separate headpiece | Compression plus a warming setting, a headpiece, or both | Whether each add-on can be switched off, and how it is serviced if it fails |
| Garment range | A garment you cannot re-order later turns a working unit into a spare pump | One or two garment sets in one size range | Several sets, in more than one size range, orderable separately | The garment part numbers, the sizes available, and the price and lead time of a replacement set |
The housing decision deserves a word of its own, because it is the one difference a buyer can see in a showroom and therefore the one that gets over-weighted. A large housing reads as a substantial piece of equipment and suits a clinic where the unit stays in one place and looks like part of the fit-out. A smaller housing can be moved between rooms, packed away when a room is used for something else, or bought as a second unit for a satellite site. Neither is better mechanics; they are different answers to how the room is used, and the room's floor plan should decide rather than the photograph.
A compression purchase goes wrong in the gaps between what the quotation says and what the room actually needs. Because the figures that matter depend on the configuration you choose, the practical move is not to accept a number from a brochure but to send a written list and ask for each answer in writing. The list below is the one that has prevented the most expensive mistakes at this end of the market; attach it to the enquiry and keep the replies with the order file. If you are also deciding which factory to buy from, our guide to evaluating a physiotherapy equipment manufacturer covers that decision separately, and buyers planning to sell under their own brand should read the private label, minimum order and margin guide alongside it.
| Area to pin down | The written answer you want before payment |
|---|---|
| Garment list | Every garment in the configuration, its chamber layout, its size range and whether each is included or optional |
| Pressure | The pressure range in each chamber, the number of steps inside that range, and how pressure is displayed on the panel |
| Cycle and timing | The length of one full pass with the garment you are buying, the fill and hold times, and the range of session timers |
| Programmes | The full programme list, which garment each assumes, and whether timing or pressure can be changed and saved per operator |
| Simultaneous garments | How many garments and how many chambers the controller can run at once, and whether performance changes when all ports are used |
| Hose lengths | The hose length supplied, whether longer hoses are available, and the connector type used on both the garment and the pump |
| Hygiene items | Whether single-use liners are supplied or sourced locally, the cleaning method the manufacturer recommends, and what must not be used on the garment |
| Space, power and weight | The footprint, the weight, the supply the unit expects in your market and the plug standard supplied |
| Documentation and training | The manual in your market's language, the training included for operators, and whether a set-up video is provided for new staff |
| Service and warranty | The warranty term and what it is counted from, the spare-part list with lead times, and how a garment is handled if a seam fails |
Send the list before you ask for a quotation, not after. A supplier who answers it in writing has told you how the unit is built and how it is supported; a supplier who waves it away with an assurance that everything is standard has told you something just as useful. The replies belong in the order file, so that a question in year two is answered by reading a document rather than by searching an inbox.
The pump in these units is a simple, slow-moving compressor, and it is rarely the part that fails. What fails is the soft equipment around it: garment seams open, bladders crease and eventually leak, zips lose teeth, hose connectors crack where they are plugged in and out twice a day, and the elastic in a strap gives up long before the machine does. That is good news for a buyer, because the failure points are cheap, predictable and mostly replaceable at the room — provided you decided at the order stage which of them to keep in stock.
Two habits stretch a garment's life considerably. The first is storing it hanging rather than folded, because a crease pressed into a bladder by a cupboard door becomes a split within a season. The second is connecting and disconnecting hoses by the connector body rather than by the hose itself; a hose pulled out by its tube is how a port is bent, and a bent port is a pump that comes back for service. Neither habit costs anything to introduce, and both are worth writing into the room's closing routine.
| Part | How it usually fails | Routine that delays it | Spare worth holding |
|---|---|---|---|
| Garment bladder and seams | A seam opens or a crease splits, and one chamber stops holding pressure | Hang, never fold; keep away from sharp edges and from the pump's exhaust | One complete spare garment set in the most-used size |
| Zips and straps | Teeth skip or the elastic loses tension, so the garment no longer fits snugly | Close the zip before storage; do not force it over a bunched bladder | Spare strap if the supplier sells it separately |
| Hoses and connectors | A connector cracks or a hose kinks permanently at the pump end | Coil the bundle loosely; hold the connector, not the tube, when plugging in | One spare hose in the most common length |
| Pump air intake filter | Dust build-up slows the fill and makes the pump run hot and loud | Check monthly, clean or replace on the schedule the manual gives | A pack of filters, since they are cheap and easy to change |
| Control panel and touchscreen | Scratches from fingernails, or unresponsive areas after cleaning fluid seeps in | Wipe with a barely damp cloth; never spray directly onto the panel | A protective film if the supplier offers one |
| Headpiece cushion, if fitted | The contact surface hardens and stops sitting flat on the face | Wipe after each use and store it flat rather than crushed in a drawer | A replacement cushion, if it is a user-replaceable item |
The commercial side of maintenance is the warranty, and it is worth settling the wording before the order rather than discovering it in the box. Units supplied through this channel carry a 24-month warranty counted from the date of shipment from the factory, and the questions to ask are what the term covers, what the buyer is expected to do before a claim is accepted, and how a soft item such as a garment is handled when it fails inside the term rather than outside it. A supplier that can answer those three questions without hesitating is a supplier whose parts list will still be available in year three.
Enough to make the squeeze feel continuous on the areas you treat most, and no more. For lower-limb work, a leg garment with a fine split below and above the knee matters more than a large total that is spread across garments you rarely use together. Ask for the chamber count per garment and per body area, then judge it on the body you treat most often rather than on the total in the brochure.
Ask for both ends of the range rather than a single maximum, and ask how many steps sit between them. The low end is what lets a first-time client be started comfortably, and the high end is what the pump can still hold once a garment is wrapped tightly around a large limb. A unit quoted only by its maximum tells you nothing about the session a nervous client will actually have.
They are different numbers. A cycle is one pass of all the chambers in the garment from the far end to the near end, and its length depends on the garment and the programme; a session is however long the timer is set for, and most clinics run somewhere between twenty minutes and forty. Plan the booking on total room time — set-up, session and changeover — rather than on the timer alone.
Only within limits, and the limits should be in writing. A garment works where it touches, so a loose fit wastes the pressure and a tight one is uncomfortable. Look for adjustment in two directions — length through overlapping sections or a zip, girth through elastic straps — and check the smallest and largest client you expect to treat before you order, not after the first week.
With a barrier layer and a wipe-down, because the garment cannot be laundered. A thin single-use liner takes the skin contact and is changed for every client; the inner surface is then wiped and the garment hung open to air rather than folded away damp. Rooms that see the same client repeatedly often keep a named garment for that client, which removes the shared-contact question entirely.
The machine does not need an operator once the programme is running, but the client does. In practice the operator fits the garment, starts the programme, checks comfort after the first minute and then works with someone else while keeping the couch in sight and the timer within earshot. How many clients one person can supervise at once is a staffing judgement, and it should set the schedule rather than the number of sockets in the room.
The garment list with chamber counts and size ranges, the pressure range with its steps, the cycle length with the garment you are buying, the programme list, the maximum number of garments the controller drives at once, hose lengths and connector type, the recommended cleaning method, the footprint and supply, the manual language and training, and the warranty term with what it is counted from. Send the list as part of the enquiry and keep the answers with the order file.
The equipment described on this page is made and supplied by Honkay, the brand of Guangzhou Huang-Kai Technology Co., Ltd., an OEM and ODM manufacturer of physiotherapy equipment working from Guangzhou, China. Our factory and offices cover more than 1,000 square metres, and we run an in-house research and development team alongside the production floor.
Because the units are built rather than resold, a compression order can be configured instead of assembled from a catalogue: the garment set and its chamber layout, the size range of each garment, the pressure steps and programme library, the control language and the housing form are all settled at the factory. Buyers who need their own badge on the panel order the same platforms under private label, and the training material, the spare-part list and the manual language travel with the order.
Honkay exports to South America, South Asia, South-East Asia, Western Europe, Northern Europe, Southern Europe, Eastern Europe, Oceania and North America, so most of the questions on this page come from buyers who have already run the numbers for their own market. More background is on our about page, and the request list above can go straight to the team.


 English
 中文