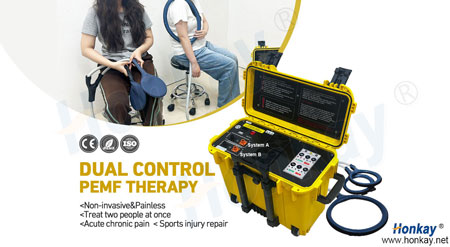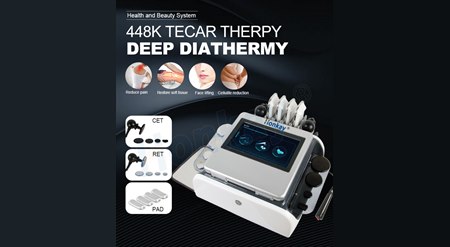
You have the applicator in your hand, the client is positioned, and the console is waiting for a mode. On a 448 kHz platform that choice is not a preference; it is the coupling you are about to use, and it decides where the energy concentrates under the applicator. This guide is written for the operator who already owns the platform or is about to order one, and who needs a repeatable rule for choosing the capacitive coupling, the resistive coupling or the PAD set for a given area, plus a rule for moving between them inside a single session.
Everything below is framed as an operating decision. The background on what TECAR is, where the name comes from and how the 448 kHz carrier behaves is covered in a separate article, so it is not repeated here; the assumption is that you are standing at the couch and need to set the machine correctly. Every figure below is taken from our own platform documentation, and the tables are written so that you can keep them beside the couch and work from them during a session.
Between the two couplings, four things change at the applicator, and only four. The first is the interface between the applicator face and the skin, which is capacitive on one side and conductive on the other. The second is the applicator itself, because the two couplings are supplied as different tips with different face diameters. The third is how the coupling behaves when the tip crosses from one tissue into another. The fourth is the sensation the client reports under the applicator as the pass continues. Everything else a therapist adjusts, from positioning to the movement pattern, is technique rather than a mode setting.
What does not change is the output frequency. The platform runs on a single 448 kHz output, and selecting a mode does not alter it. If a supplier quotes one frequency for capacitive work and another for resistive work on the same system, treat that contradiction as a question to raise before you order. Power is a separate matter: each coupling is rated at 400 W on this platform and the machine overall at 600 W, while the level you actually dial in is set from the handle and from the client's feedback, and is a small part of the rated figure.
| What you look at | Capacitive (CET) | Resistive (RET) | PAD |
|---|---|---|---|
| Applicator-to-skin interface | A capacitive applicator whose face is separated from the skin by a dielectric layer, so no metal touches the client | A conductive metal electrode in direct contact, with the circuit returning through the tissue | Four flat handles strapped over the area, with a flexible return plate completing the circuit |
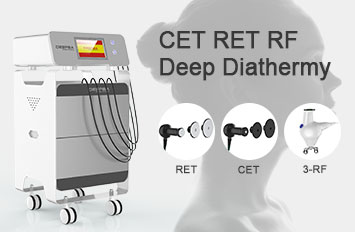
| Applicators supplied and face diameters | 4 tips at 70 mm, 60 mm, 35 mm and 30 mm | 4 tips at 70 mm, 55 mm, 40 mm and 30 mm | 4 handles, each 14 × 8.5 cm |
| Rated mode power | 400 W | 400 W | Set on the same console, which is rated at 600 W overall |
| How the coupling reacts at a tissue boundary | It prefers water-rich tissue, so it loses its easy path when the tip crosses onto a tendon or a bony edge | It needs the higher-impedance path, so it is chosen where there is less free fluid in the tissue | It works across the whole contact area at once, so the boundary is the edge of the pads rather than the tip |
| What the hand and the client register | Operators often describe a broad, even build-up of warmth that spreads past the tip | Operators often describe a more focal warmth that arrives quickly at the point of contact | Warmth is spread over the whole strapped area, and the hands stay free while the pads are in place |
| Tissue it prefers and typical reach | Water-rich tissue: muscle, soft tissue and the superficial layers | Higher-impedance tissue: tendon, joint structures, dense connective tissue and bone surfaces | Firmer, deeper or fibrotic tissue within about 5 cm, and wide body-surface areas |
| Where operators usually start | Broad muscle groups, the back and the limbs, and the superficial layers | Tendon attachments, joint margins and dense connective tissue | Areas too large or too firm for a moving hand-held pass |
| When operators switch away from it | When the target moves from soft tissue onto a dense structure, or the warmth stops building | When the pass returns to a broad muscle area, or the contact point becomes uncomfortable | When the plan narrows to a focal target that a hand-held applicator can reach better |
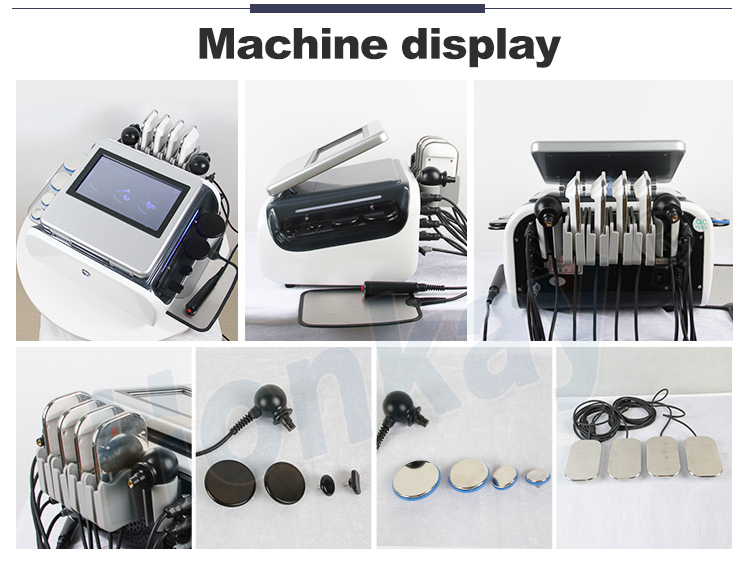
Read the two applicator rows together and the practical rule falls out. The coupling follows the tissue under the tip, not the name of the case on the booking sheet, and the applicator face follows the size of the target you can actually reach. A broad muscle belly and a tendon attachment three centimetres away are two different couplings on the same client, in the same session, with two different tips.
This section describes the coupling mechanics only; it does not make clinical claims. In capacitive mode the applicator is separated from the skin by a dielectric layer, and the circuit is completed capacitively. The current then takes the easiest available path, which is tissue with a high water and electrolyte content, because that tissue conducts more readily than denser material. The energy therefore spreads through muscle and the superficial layers rather than concentrating at the densest point under the tip.
In resistive mode the applicator is a conductive metal electrode in direct contact with the skin, and the circuit returns through the tissue to the return plate. Because the current has to pass through denser, drier tissue with less free fluid, the greatest resistance, and therefore the greatest concentration of energy, sits where that resistance is highest: tendon, dense connective tissue and bony surfaces. The PAD set applies the same logic over a much larger contact area, which is why it is the group chosen for firmer tissue within about 5 cm and for wide body-surface regions.
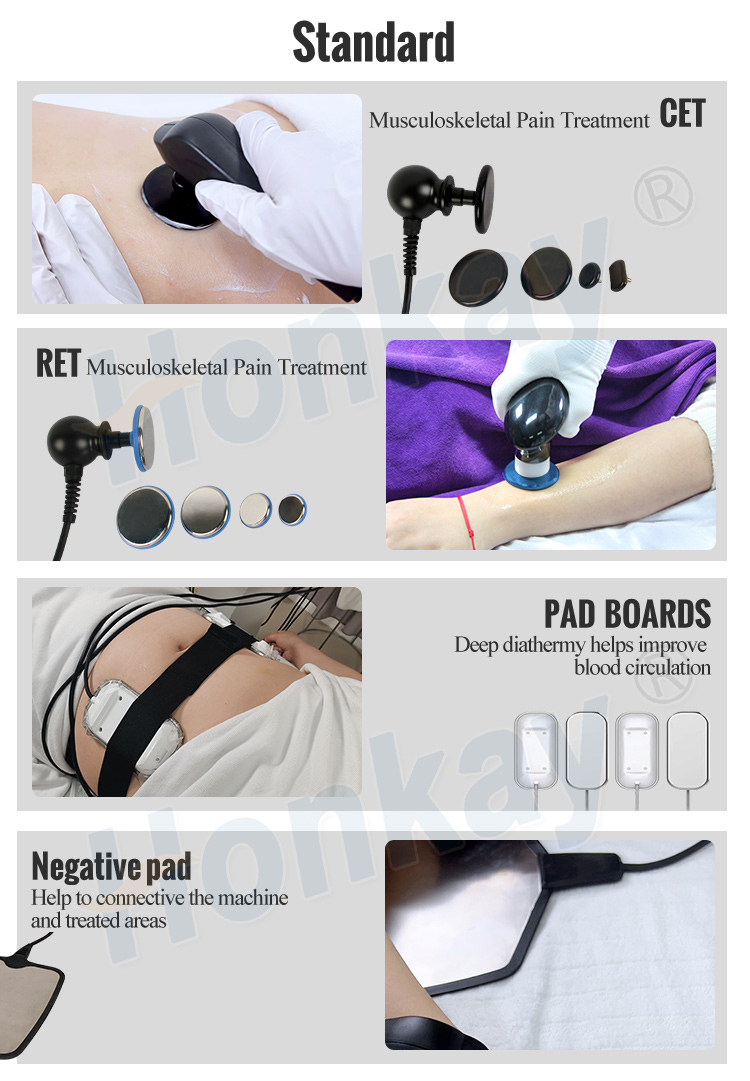
The consequence for the operator is that the same input produces a different distribution depending on the coupling. That is the whole reason the mode exists as a selectable setting rather than a fixed one, and it is why the machine is rated at 400 W for each coupling but the useful setting during a pass is usually a fraction of that figure, raised from zero until the client confirms a comfortable sensation.
The areas below are the ones clinics ask about most often. The pattern is always the same: start where most of the tissue is, reach for the other coupling only where the tissue changes, and change the applicator face with the coupling. Nothing in the table is a promise about an outcome; it is a starting decision that the operator then adjusts from what the client reports and what the pass actually feels like.
| Area | Coupling operators start with | Applicator and face | What to watch during the pass | When the other coupling comes in |
|---|---|---|---|---|
| Shoulder | Capacitive, over the muscle of the deltoid and the upper back | 70 mm or 60 mm capacitive tip for the broad pass | Even warmth across the whole cap of the shoulder, applicator kept moving | Resistive at the joint margins and tendon attachments, with a narrower tip |
| Low back | Capacitive over the paraspinal muscle, or the PAD set for the whole region | 70 mm tip, or the PAD handles strapped across the area | That the pads sit flat and the skin under them stays intact and comfortable | Resistive at the bony edges and dense tissue, not across the whole back |
| Knee | Capacitive over the muscle above and below the joint | 60 mm or 35 mm capacitive tip | A steady, even warmth rather than a sudden build-up at the joint line | Resistive at the joint margins and the tendon attachments around the knee |
| Ankle and foot | Resistive, because the target tissue is dense and close to the surface | 40 mm or 30 mm resistive tip | Comfort at the margins, with the tip kept moving around the small joint | Capacitive only over the calf muscle if the plan includes the lower leg |
| Tendon and tendon attachment | Resistive, where the tendon is the target | 40 mm or 30 mm resistive tip | That the client reports warmth, not a pinching or sharp sensation | Capacitive on the muscle that shares the attachment, as a separate pass |
| Large muscle group | Capacitive, or the PAD set when the region is very wide | 70 mm capacitive tip, or the PAD handles | That the whole muscle is covered, not just the track the hand happens to follow | Resistive only where a dense border or attachment is part of the plan |
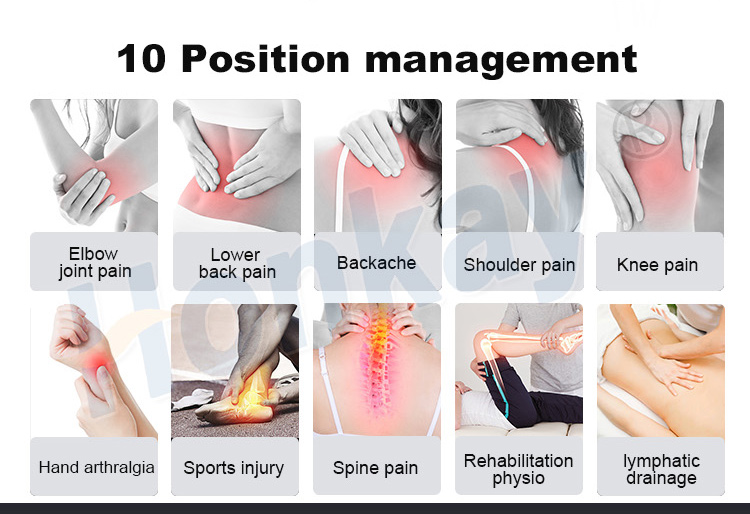
Two habits make this table work in the room. First, decide the coupling after you have felt the tissue, not before you touch the client. Second, keep the applicator diameter matched to what you can reach, because a wide face spreads energy comfortably over a muscle but is wasted on a small joint margin, and a narrow face on a large muscle leaves most of the area untreated.
One more scheduling note. When a case spans two areas, such as the neck and the shoulder, do not try to hold a single coupling across both. Treat them as two short passes with their own coupling and their own applicator face, and let the record show which was which. That keeps the decision honest for the next session and stops one area being worked with a compromise setting that suits neither of them.
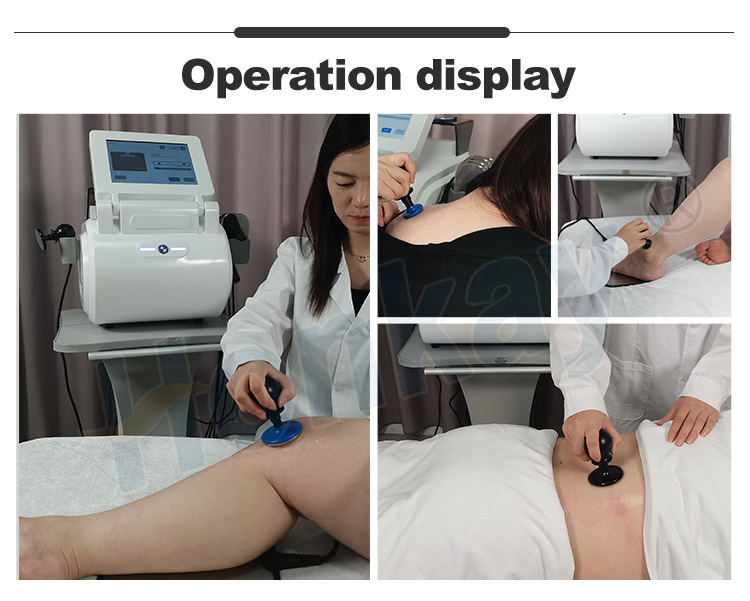
Cross-fire is a technique rather than a third mode. The operator works the target with two applicators angled at it from opposite sides, so that the two fields meet inside the tissue instead of the energy concentrating in the surface layers directly under a single hand. It is normally reserved for structures where a single surface pass would keep the energy shallow, such as the margins of a joint or a deep, dense region that sits under a thick layer of muscle.
In scheduling terms, cross-fire is a short section inside the pass, not a separate appointment. The usual pattern is a broad opening pass with whichever coupling matches most of the tissue, then a focal pass on the denser target, with the cross-fire section sitting inside that focal pass. Two operators can work the two applicators at the same time, or in a single-operator setting the therapist alternates the applicator angle around the structure while keeping one hand on the client.
| Phase of the pass | Coupling | Applicator | Share of the session | What to check |
|---|---|---|---|---|
| Opening pass | Capacitive | 70 mm or 60 mm face over the whole region | The larger share of a broad area | Even warmth across the region, applicator kept moving throughout |
| Focal pass | Resistive | 40 mm or 30 mm face on the denser structure | The smaller share, aimed at one target | Comfort at the margins, and no sharp heat at the contact point |
| Cross-fire section | Whichever coupling matches the target | Two applicators angled from opposite sides of the structure | A short section inside the focal share | The client feels even warmth, not pinching, and the skin stays cool to the touch |
| Close | The coupling that matched the target | The same face, energy eased down | The final minutes | Skin clean and intact, and the settings recorded for the next therapist |

Cross-fire is also the point where two operators should agree on the plan before the client is on the couch, because two hands means two intensities. The usual convention is that one applicator leads and the other follows, with the follower kept at a lower setting until the client confirms the sensation is even across the whole target rather than concentrated under one hand.
Cross-fire is not worth using everywhere. If the target is a single broad muscle, or if the tissue sits close enough to the surface that an ordinary pass already warms it evenly, the second applicator adds complexity without changing the plan. The technique earns its place at dense structures under a thick covering of tissue and at joint margins, and it is dropped again as soon as the target becomes broad and superficial.
A switch is a response to a signal in the room, not to the clock and not to the name of the case. The signals below are all things the operator can see, feel or hear from the client during a pass; each one points to a change in the tissue under the tip or in the plan, and none of them is a claim about a clinical result. When one appears, the habit is to lift the applicator, re-assess, and then either change the coupling or change the applicator face before continuing.
| Signal you notice | What it suggests objectively | Action |
|---|---|---|
| The client says the warmth has stopped building although the pass is continuing | The tissue under this coupling is no longer the easiest path for the current | Re-assess the tissue, then consider the other coupling or a different applicator face |
| The hand senses a sudden build-up of heat as the tip crosses onto a tendon or a bony edge | The coupling has moved from water-rich tissue into higher-impedance tissue | Lift off briefly, then either stay capacitive over the soft tissue or change to the resistive coupling |
| The target moves from a broad fleshy region to a single focal point | The area being worked has changed, not the client | Change the applicator face to match, and the coupling if the new target is denser |
| The client reports a sharp or pinching sensation instead of even warmth | Energy is concentrating faster than the tissue can disperse it | Stop, reduce the intensity, check the skin, and resume only at a comfortable level |
| The pass reaches the edge of the area you planned to cover | The plan has reached a boundary rather than the tissue changing | Close the section or extend the plan; do not raise the intensity to chase the edge |
One rule sits above all five signals. If the client's feedback is unclear, or if there is any doubt about whether the tissue under the applicator should be worked at that point, the pass stops and the case is referred to the treating clinician. The coupling is a machine setting; the decision to use it at all is a clinical one.
The mistakes below are the ones we see in training rooms and in the questions clinics send us after delivery. Each one is a specific action rather than a general principle, and each has an equally specific replacement habit. Most of them come down to the coupling being treated as a fixed setting for a case instead of a live decision made at the couch.
| Mistake | How it looks in the room | Better habit |
|---|---|---|
| Choosing the coupling from the booking note instead of the tissue | Every client with the same area gets the same mode, whatever the tissue feels like on the day | Feel the tissue first, then select the coupling and the applicator face |
| Parking the applicator on one spot | The hand stops moving while the operator talks or watches the screen | Keep a continuous controlled pattern so no single point builds heat |
| Dialling up to a memorised number out of habit | The intensity is set before the client reacts, and stays there | Start from zero and raise only as far as the client confirms comfortable warmth |
| Using a wide face on a small, dense target | A 70 mm applicator over a joint margin or a narrow tendon | Wide face for broad muscle, narrow face for dense, small targets |
| Pressing the capacitive tip down hard | The operator leans bodyweight onto a tip designed to couple across a gap | Keep light, even contact and let the coupling, not the pressure, do the work |
| Strapping the PAD handles without checking depth or skin | Pads are laid over an area deeper than they are designed for, or over irritated skin | Confirm the target is within the intended depth and the skin is intact before strapping |
| Switching coupling mid-pass without re-checking sensation | The tip is changed and the pass continues at the same intensity | Pause, confirm comfort under the new coupling, then continue |
| Recording only the area that was treated | The note says which region was worked but not how | Record coupling, applicator face, intensity and time so the next therapist can repeat it |
A clinic that fixes these eight habits gets a second benefit beyond repeatability. The settings in the record become the clinic's own starting points for each area, which is far more useful than a generic protocol sheet, because they were written down on the actual platform with the actual applicators in the room.
Because this article is about choosing between couplings, the equipment question is narrower than a general buying guide: what does the machine itself need in order to make mode selection a real decision rather than a brochure line? The short answer is a full applicator set for both couplings, control of the mode and the intensity at the handle, and a specification you can check on paper before the order. The checklist below is the one we recommend sending to every supplier you compare, including us.
| Requirement | What a good answer looks like | Why it matters for mode choice |
|---|---|---|
| Output frequency | A single fixed figure, 448 kHz, stated for the platform rather than a different figure for each mode | Lets you compare suppliers on the same number and avoids a contradiction in the specification |
| Mode power ratings | The capacitive rating and the resistive rating given separately in watts, each stated as 400 W | Confirms both couplings are supported at full strength rather than one being a token mode |
| Overall machine power | The platform rating in watts, stated as 600 W | Shows the headroom behind the two mode ratings |
| Applicator set for both couplings | The exact counts, with every face diameter listed: 4 resistive tips at 70 mm, 55 mm, 40 mm and 30 mm, and 4 capacitive tips at 70 mm, 60 mm, 35 mm and 30 mm | The diameters are what let you match the face to the target instead of compromising |
| PAD set | The number of handles and their size, stated as 4 handles at 14 × 8.5 cm | Decides whether wide surfaces and firmer tissue within about 5 cm can be covered without a hand-held pass |
| Mode and intensity control | Written confirmation that the coupling and the intensity are set from the handle | Mode changes during a pass are only practical if the operator stays at the couch |
| Return path | A flexible return plate supplied with the applicator set | The resistive coupling depends on the return path, so it belongs in the original order |
| Packing data | Carton size and gross weight, stated as 50 × 45 × 42 cm and 29 kg | Lets freight be quoted before the order is placed |
| Session parameters | Typical session length by area, stated as 20 to 40 minutes for facial work and 30 to 60 minutes for a body area | Fixes the time available for the pass before you plan a time split between couplings |
| Training and handover | A written statement of the installation and staff training included with the order | A second therapist can only repeat a mode decision if the first one was handed over |
| Warranty | A 24-month warranty counted from the date of shipment from the factory, confirmed in writing | Fixes the support window before you commit to the platform |
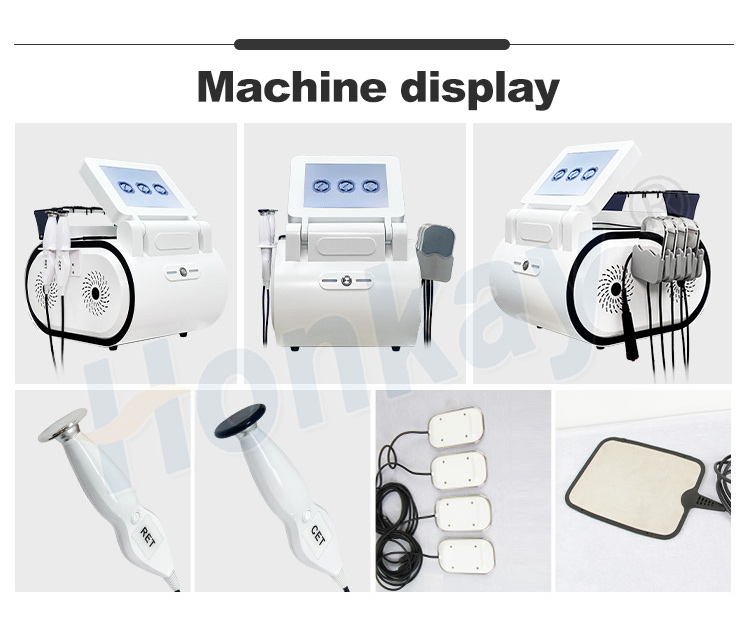
If you take only one item from the list, take the applicator set. A platform that offers both couplings but ships with a thin selection of tips will push your therapists into using one face for everything, and that is the fastest way to lose the operational advantage that made you choose a dual-coupling machine in the first place. Ask for the counts and the diameters in writing, and compare them line by line against the areas you actually plan to book.
The difference is how the energy is coupled and which tissue that coupling prefers, not the frequency. On this platform both couplings run on the same 448 kHz output. A capacitive applicator is separated from the skin by a dielectric layer and couples into tissue with a high water and electrolyte content, such as muscle and the superficial layers. A resistive applicator is a conductive electrode that returns the current through tissue with higher impedance, such as tendon and dense connective tissue. The operator selects the coupling that matches the tissue being worked on the day.
The lumbar region is large and mostly muscle and soft tissue, so operators commonly start with the capacitive coupling for the broad pass, or the PAD set when the whole region is to be covered at once or when the target is firmer tissue within about 5 cm of the surface. The resistive coupling is more often added at the denser edges and the bony borders rather than across the whole area. Any decision about a specific client, and especially any underlying condition, belongs with the treating clinician.
The tissue around the knee changes within a few centimetres, so operators often start with the capacitive coupling over the muscle above and below the joint and then move to the resistive coupling over the denser tissue at the joint margins and tendon attachments. The applicator face follows the target: wider for the muscle, narrower for the margins. If there is an implant in the area, or any other condition that needs assessment, the case goes to professional medical judgement before treatment.
Yes, and many operators do, because the two couplings are aimed at different tissue within the same region. The usual pattern is a broad pass with one coupling, then a focal pass with the other, changing the applicator to match the target. Nothing about moving between couplings requires a pause in the session, but the client's feedback should be re-checked after each change, because the sensation under the applicator changes with the coupling.
A single-coupling machine can only deliver one interface, so it is limited to the tissue that coupling prefers. Whether that is enough depends entirely on the case mix you plan to book. A clinic that works both broad muscle areas and denser tendon or joint regions, or that covers large surfaces, will normally want both couplings and the PAD set on one platform, which is why the complete applicator set is usually ordered with the first machine rather than added later.
Cross-fire is a technique, not a third mode. The therapist works the target with two applicators angled at it from opposite sides, so the two fields meet inside the tissue rather than the energy concentrating in the surface layers under one hand. It is used where a single surface pass would keep the energy shallow, such as the margins of a joint or a dense region under a thick muscle layer. It is combined with whichever coupling matches the target tissue and scheduled as a short section inside the pass.
Session length is set by the area rather than by the coupling. On this platform a facial treatment is typically 20 to 40 minutes and a body area typically 30 to 60 minutes, and any time split between two couplings sits inside that total. Operators often give the broad pass the larger share and the focal pass the smaller share, adjusting from the client's feedback. These are planning figures rather than promises, and the response to any programme varies by individual.
If you are setting up a treatment room, adding a TECAR programme to an existing clinic, or building the platform into a distribution portfolio, we can walk your team through the coupling choices, the applicator set and the checklist above, and confirm the specification in writing.


 English
 中文
中文